1/03/2018

Blue Fern Studio, my first series

Good morning bloggers,

Today is an exciting day for me, as I am getting the opportunity to share with you my very first projects for Blue Fern Studios.

Sweet Dreams (Layout #1)


 The inspiration from this page started with this amazing paper in the Remnants collection called Devonshire. I fell in love with the printed flowers and birds on this particular page.

I started playing with my chipboards by adding seedlings to cover them, I have to say that I was very pleased with the results and love the dimension this brings to the layout. I used Meadow seedlings.

The title, oh what color to chose is always a challenge I find. I was intrigued by this new embossing powder called Night Sky, at first, I wasn't certain it would have a fit on a boy's page but at the end I enjoy the contrast that it has with the Meadow seedlings, so I opted for this color.


The center of the Remnants bloom flowers has a slight yellow highlight that I covered in white gesso, then glued a mix of mauve seedlings and red wine glitter. The results are amazing.


Around my picture I used night sky embossing powder with weathered doilies stamp set. On my chipboard circle flourish small frame, I used one of the new colors green ivory


Once my layout is done, then I added touches of red wine and icicle glitter to my flowers and some on the paper.


Blue Fern Products used:

Paper: Remnants Devonshire & Callaway (6x6)

Glitter: Red Wine & Icicle

Chipboard:
Floral Lattice Bits
Sweet Dreams
Circle Flourish small
Thistle Spray

Flowers:
Remnants Bloom & Florals
Wanderlust vine


Seedlings: Mauve and Meadow

Embossing Powder: Night Sky & Green Ivory

Stamps:
Weathered Doilies
Tattered Newsprint
Vintage Edges

***********************


Remember this Day : Sintra Portugal (Layout #2)


If you enjoy traveling and you've never ben to Portugal, trust that this needs to be added to your bucket list. Sintra is a beautiful city that has amazing Unesco sites that are spectacular to visit. When I looked at the stunning paper from the REMNANTS collection, I knew it was perfect for this picture. This paper is Bloomsbury, I loved the old books look at the detailed printing of the flower and clock.
The title is part of the Remnants chipboard series and so perfect for a capturing any precious moment.


I wanted to add a bit more red to the page, so I chose to work with a stencil, light molding past and this amazing Garnet embossing powder. Once the embossing was done, I wanted to add more stamping to the background. I chose to use the Vintage Edges stamp set.

I love adding flowers to my projects, on this layout I added some from the Remnants Bloom and Floral Collections. I also cut out some flowers from the amazing lace 4 set.


For the chipboard, I inked the Shabby Brick bits. Once my layout was almost completed, I added the final touches with splatters of inks, white gesso and touches of Sterling Silver Seedlings.


Blue Fern Studio products used:

Paper:
Remnants Bloomsbury

Chipboard:
Remnants printed collection self adhesive
Shabby Brick Bits

Flowers: Remnants Bloom & Florals

Embossing Powder: Garnet

Seedling: Sterling Silver

Stamp: Vintage Edges

***********************

Love (Layout #3)


 I just loved this picture of my niece with the new born son Ayden, I've been enjoying making many pages for her recently. I have to say that this one is simple but oh so happy about how it turned out.


The starting point was this amazing paper from the Happy Accident collection called Incident. I love textured backgrounds and this one does the work for you, so rich in details, I opted not to alter it and just build layers.


I selected to emboss the Chicken Wire Panel with Blue Sky embossing powder. I did the same with the Love title chipie.


On my flowers, I opted to add some touches of white gesso and Blue Ice glitter.


Blue Fern Studio products used:

Paper:
Happy Accident- Incident

Chipboard:
Chickenwire Panel
Love title

Flowers: Remnants Bloom & Heartland Blossoms

Embossing Powder: Blue Sky

Glitter: Blue Ice


Well I hope you enjoyed my 3 pages for my first series with Blue Fern Studio, I wish you a very crafty 2018 !


Other Products Used:
Clear & White Gesso
Distress Bundled Sage (2)
Lindy's: Pink Ladies Pink (1) Magnolia Magenta gold (2), Chateau Rose Sprays (2)


1/01/2018

More than Words January challenge

Happy New Year everyone !

Time to get our crafty resolutions in gear and start having fun with the More Than Words blog challenge.

It's an exciting day as this is my very first project as part of the More Than Words Design team member for 2018. I hope you'll enjoy my take on the challenge and join in on the fun.

My test subject for this project, my friend's beautiful daughter Lauren.


This month, a fun theme: LINK
Word Inspiration - BIRTHDAY
Creative Challenge - TAGS


On my part, BIRTHDAY inspired me with celebrating your very 1st birthday. Lauren has a smash the cake style photoshoot to celebrate her very first birthday. Oh how I wish that concept had existed when my boys where that age. I love the softness of the picture and wanted to capture that in my creation.

TAGS: Are they not just so versatile and easy to use on our layouts? To ensure I had the right tones, I opted to make my 3 tags using my dies and using papers for the same collection.

A bit of twine for the top of the TAG and voila, instant decorative element.


I am a big fan of flairs, and this Cuts2luv butterfly flair was just perfect:


I love when the paper vendors also make word stickers, this paper collection from Kaisercraft had the perfect Happy Birthday for this page.


Light embossing of butterflies and some added water coloring with my Lindy's stains gives this layout the softness that I was looking for.


Flowers, a Cuts2luv flair, a butterfly cluster and voila, all done.


Products used on this page are:

  • Paper: Kaisercraft Sage & Grace collection pack
  • Lindy's Pop-Rock Purple & Brathwurst embossing powders
  • Lindy's Magnolia Magenta Gold Spray
  • Chipboard: Blue Fern Studios
  • Flairs: Cuts2luv
  • Stamp: Penny Black Playful & Stampendous Butterfly trio


I hope you enjoyed my take on the challenge,  I wish you a wonderful day and a more fabulous 2018 to come.

France xxx


12/30/2017

On the list for Creative Embellishments

Hi bloggers, hard to believe that we are already December 30th, this means that this will be my last page for my mandate part of the Creative Embellishments team. This time, I was inspired by the Holidays and wanted to capture an activity that I do with my sons. Every year, we participate in the city wide gathering of food for many local organisations or families that have low income.  We go door to door and pick up the generous donation of our local residents. It's an amazing day.


I love playing with single colors, on this page I wanted a simple gold and white layout and just keep my picture with a pop of color.

I heat embossed my chipies with gold embossing powder.


The chipboards used for this page are the following:


I hope you've enjoyed my projects over the last 12 months. On my part, I've truly enjoyed the opportunity of being part of the Creative Embellishments team. It is a wonderful brand with amazing products and I truly want to thank Nicolle for allowing me to be part of her Creative Team and wish the 2018 team a wonderful continuation and lots of success.


12/28/2017

Hush Little Baby pour Cuts2luv & Mixed Media & Art

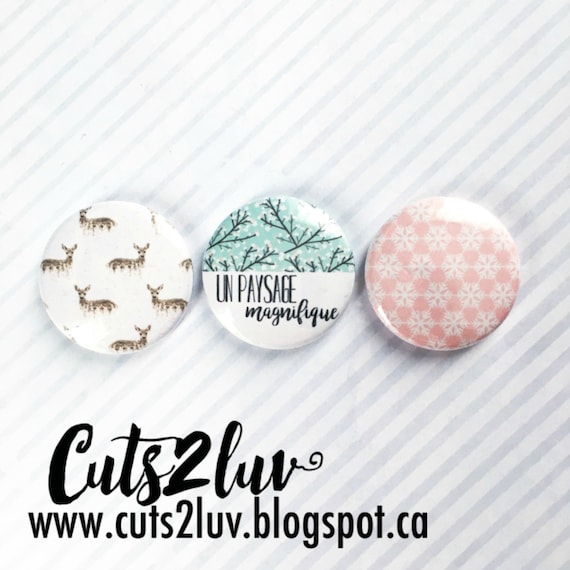
En ce temps froid de Décembre on adore mettre les têtes de chevreuils sur nos projets, encore cette année, ils sont tellement à la mode. Aussi, Cuts2luv en a un qui est magnifique dans sa toute dernière collection, ce badge est la source d'inspiration pour mon projet.


Il y a 2 badges sur ma pages, un qui est l'inspiration, soit le chevreuil avec un motif répétitif et l'autre qui est niché sous ma découpe de chevreuil, un ombragé d'une collection antérieure.


Je craque pour le papier, la combinaison du brun, taupe, vert et bleu est parfait pour une page thématique chevreuil. Le papier et les chipboards (titre et câdres) sont de la compagnie Blue Fern Studios.

Les poudres à embossier de Blue Fern Studios sont: In the Navy qui a un effet métallique et Antique Gold. Les microbilles sont des Seedlings de Blue Fern Studio couleur argent.

Sous le titre, un petit jeu d'aquarelle avec mes spray Lindy's, ma couleur coup de coeur: Baby Blue Eyes Aqua


Le badge est de cette collection Paysages Magifiques:


La 2e source d'inspiration pour ce projet est le défi en ligne de Mixed Media & Art. Je me suis inspirée du sketch, des couleurs et du chevreuil.


Je souhaite que je vous inspire d'ajouter le chevreuil sur vos projets et je vous souhaite une magnifique journée !


12/25/2017

Handmade Christmas Gift packages & Words & Paintery challenge entry


Good morning bloggers, Merry Christmas to all of you !

This year I was inspired to create for my crafty friends  a hand made gift wrapped package (trust I did not do all my gifts this way heheee)


I started with plain Kraft paper, then thru a stencil I added the Finnabair snowflake paste.

I heat embossed my chipboards the for the snow at the bottom, just added light and fluffy modeling paste. It was as simple as 1-2-3 but took 1h30 to complete both packages. 


I am taking this opportunity to enter this project into this challenge:


Words & Paintery December challenge


I know my crafty gals will enjoy this package, now here is to hoping that they'll want to open them on our crafty day together.

Happy Holidays to you all !

France xxx

12/16/2017

Christmas cards for Creative Embellishments

It's beginning to look like Christmas in our house. I love making Christmas cards, it is such a personal touch for our loved ones.

The many Creative Embellishments Christmas themed chipies makes it easy to create fun cards.


This first card I wanted to have the word Christmas, I heat embossed the title and ornament in Gold. I cut out the first part of the quote from a small word sticker I had to make one of my favorite sentences : Dreaming of a white Christmas


This second card I wanted to us a deer... They are so much fun to use this time of year. Again, I just heat embossed this one in gold. A touch of twine, a sentiment and I was done, a nice cute card.


Elements used on my cards are:


I hope you enjoyed my cards, thanks for stopping by !